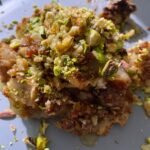
Pear Crisp
While many varieties of pears can be used in this recipe, some are better suited for baking than others.
Servings 1 Person
Calories 364kcal
Equipment
- 1 Mixing bowl
Ingredients
- 6-8 medium-sized Pears, peeled, cored, and sliced.
- 2 tbsp Fresh lemon juice to prevent the pears from browning.
- ½ cup Granulated sugar to enhance the natural sweetness of the pears.
- ¼ cup All-purpose flour to help thicken the pear filling.
- 1 tsp Ground cinnamon to add warmth and depth of flavor.
- ¼ tsp Ground nutmeg for a hint of nutty aroma
- A pinch of salt to balance the sweetness and enhance the overall taste.
- 1 cup Old-fashioned rolled oats for the crisp and crunchy topping.
- ½ cup Packed brown sugar for a rich and caramel-like sweetness.
- ½ cup All-purpose flour to bind the crisp topping together.
- ½ cup Cold unsalted butter, cut into small cubes, for a buttery and golden topping.
Instructions
- Preheat the Oven: Start by preheating your oven to 375°F (190°C). This will ensure that the pear crisp bakes evenly and develops a golden and crispy topping.
- Prepare the Pear Filling: In a large mixing bowl, combine the sliced pears, lemon juice, granulated sugar, all-purpose flour, ground cinnamon, ground nutmeg, and a pinch of salt. Gently toss the ingredients until the pears are well coated with the mixture.
- Transfer to a Baking Dish: Transfer the pear filling into a 9x9-inch (23x23 cm) baking dish, spreading it evenly. Make sure to leave any excess liquid behind as it can make the crisp soggy.
- Prepare the Crisp Topping: In another mixing bowl, combine the old-fashioned rolled oats, packed brown sugar, all-purpose flour, and cold unsalted butter cubes. Using your fingertips or a pastry cutter, mix the ingredients until they resemble coarse crumbs. The butter should be evenly distributed throughout the mixture.
- Top the Pear Filling: Sprinkle the crisp topping over the pear filling, covering it completely. Press the topping lightly to create a compact layer that will turn golden and crispy during baking.
- Bake to Perfection: Place the baking dish in the preheated oven and bake for 35-40 minutes or until the pears are tender and the topping is golden brown. You'll know it's ready when the aroma of baked pears and spices fills your kitchen.
- Let it Cool: Once baked, remove the pear crisp from the oven and let it cool for a few minutes. This will allow the flavors to meld together and the filling to set slightly.
- Serve and Enjoy: Serve the pear crisp warm or at room temperature. It pairs beautifully with a scoop of vanilla ice cream, a dollop of whipped cream, or a drizzle of caramel sauce. Each bite is a delightful combination of soft and sweet pears with a crispy and buttery topping.
Notes
Tips for Achieving the Perfect Pear Crisp Texture
While making pear crisp is relatively straightforward, a few tips will ensure that your dessert turns out perfectly every time. Here are some expert pointers to keep in mind:- Choose Ripe, But Not Overripe Pears: Look for pears that are ripe but still firm. Overripe pears can turn mushy during baking, compromising the texture of the crisp.
- Slice the Pears Uniformly: Try to slice the pears into uniform pieces to ensure even cooking. This will prevent some slices from becoming too soft while others remain firm.
- Mix the Pear Filling Gently: When combining the pear filling ingredients, make sure to mix them gently. Over-mixing can break down the pears and release excess moisture, resulting in a watery crisp.
- Leave Some Space for the Topping to Expand: When transferring the pear filling into the baking dish, leave a little space at the top. This will allow the crisp topping to expand and spread out during baking, creating a beautiful golden crust.
- Use Cold Butter for the Topping: Using cold unsalted butter is essential for achieving a crispy and crumbly topping. The cold butter will melt during baking, creating small pockets of air that give the crisp its signature crunch.
- Watch the Baking Time: Keep a close eye on the pear crisp as it bakes. You want the pears to be tender, but not overly soft, and the topping to be golden brown. Adjust the baking time accordingly to achieve the desired texture.
Nutrition
Serving: 284g | Calories: 364kcal | Carbohydrates: 66.4g | Protein: 10.9g
